

Die 2 Hohlnieten ausbohren


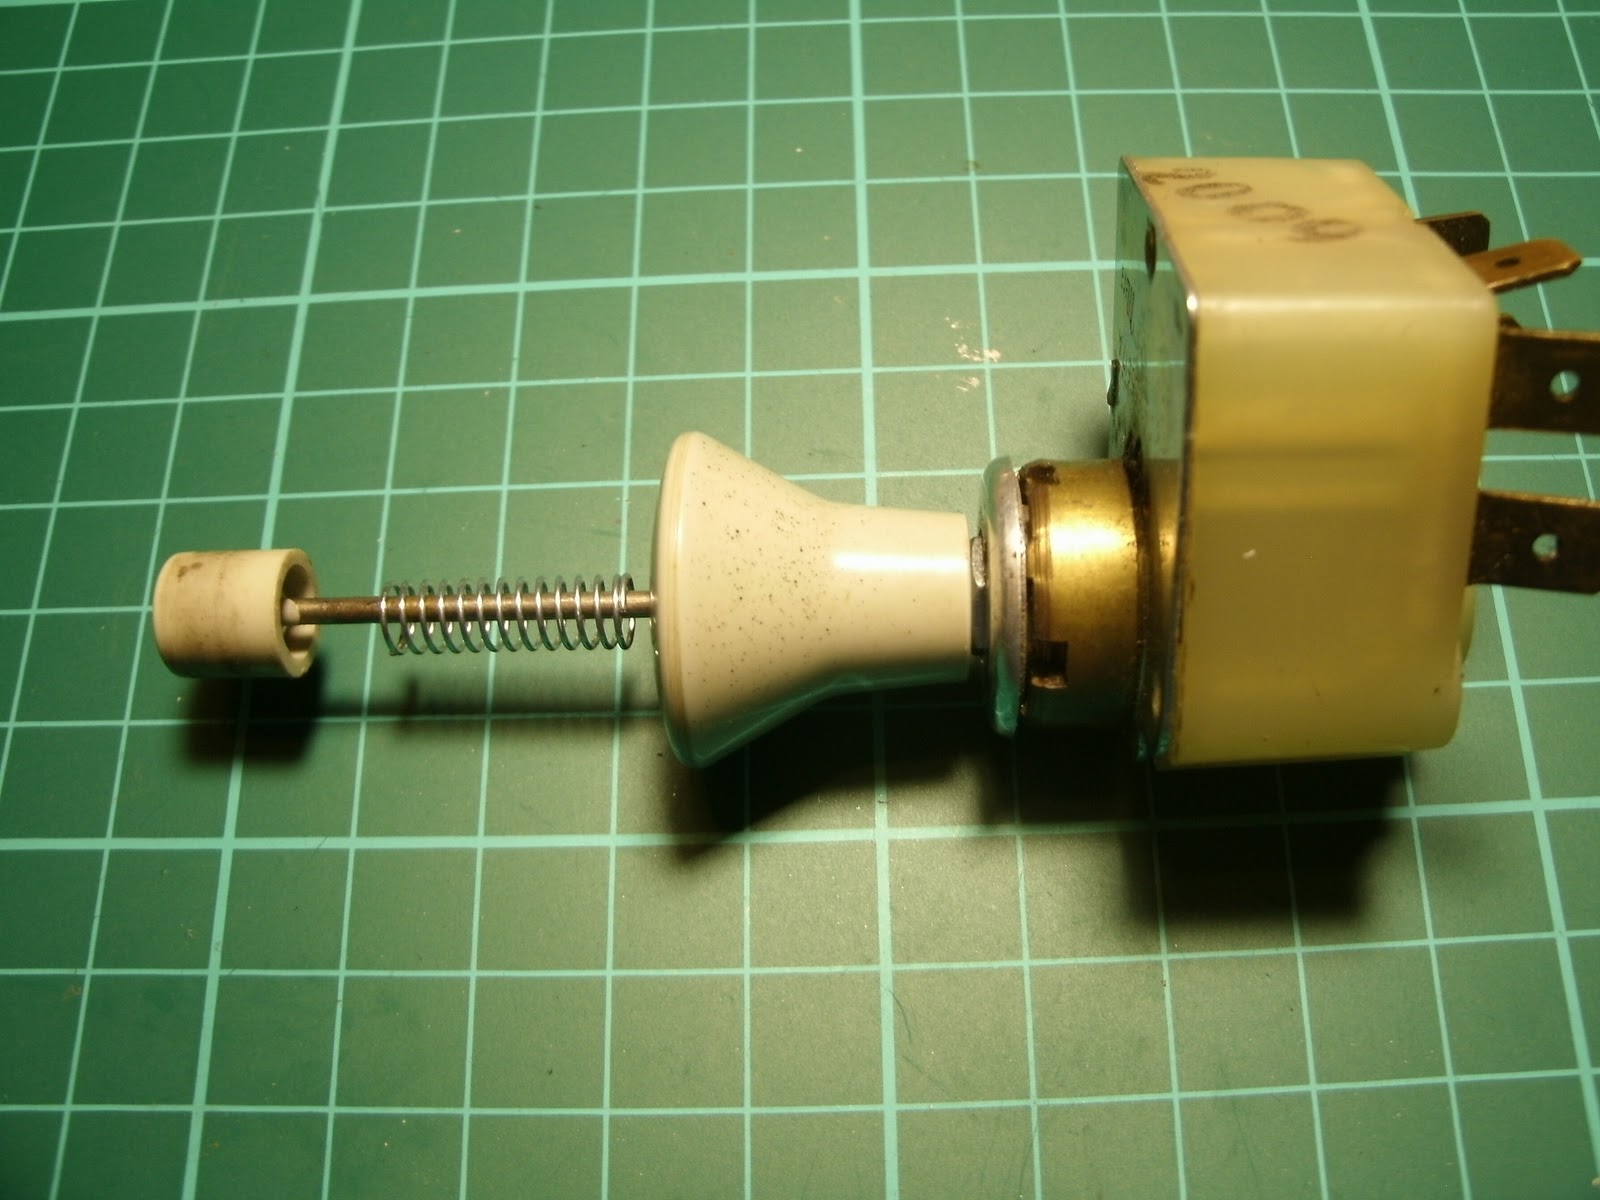
Note the plastic inner knob has a plastic pin attached,
the outer knob has a guidance diameter which goes into the housing.
Knopf und Ventil entfernt. Der Plastikknopf hat einen Führungszapfen der in das Gehäuse eintaucht. Der Innenteil des "Drückers" hat einen Plastik-pin.

Um die Führung zu erstzen habe ich provisorisch eine M5 Mutter eingeschraubt, die wird durch einen Kunststoff-Distanzring ersetzt.

works perfect with the "spacer")
Testmontage. Die Führung des alten Knopfs im Gehäuse übernimmt die Mutter tadellos!

The old inner knob has a metal pin!
Weil jetzt das Ventil mit der Gummi-Membran fehlt, ist der innere Teil nicht mehr unter Vorspannung, also habe ich eine Feder eingebaut. Der Alte Betätiger hat einen Metal-pin!
Montagereihenfolge


Noch ein Distanzring und ein Klemmring um den Hub des Drückers zu begrenzen

Ringe montiert ( Die Schraube wird noch gegen eine Madenschraube getauscht um einen Kurzschluss zu vermeiden)

Sieht aus "wie echt"

Aus ABS Kunststoff habe ich einen Haltewinkel angefertigt (wieder wegen der Kurzschlussgefahr)

these 2 parts now have to be mated
Jetzt müssen die beiden Teile noch verheiratet werden...
I will use some M3 stainless hardware
Ich verwende M3 Edelstahlschrauben dafür


switch engaged, - note the contact arm is parallel to
the micro switch housing, now electric washer pump would run
Schalter betätigt, die Schaltfahne liegt parallel zum Schaltergehäuse, die elektrische Pumpe würde jetzt kontaktiert

disengaged, as 99,9% of driving time - as my car will be a daily driver - but only for days with nice weather!
Unbetätigt, so wie 99,99% der Fahrzeit - soll ja schliesslich ein Schönwetterauto werden...
All components can be re-used, nothing was hacked or damaged (besides the 2 rivets)
Ganz nach meinen Geschmack.
AntwortenLöschenMarke: Nick Knatterton
http://www.youtube.com/watch?v=HfMlK56sICE&feature=related
Der Ralli
Super Erklärung.
AntwortenLöschenVielen Dank.
Viel Spaß noch beim Zusammenbau.
Gruß Timo
Hi Markus, habe vergessen nachzusehen, wie mein Schalter aufgebaut ist. Liefere ich noch nach, die Fotos. Sorry! Das Leben is grad ein wenig hektisch ;-). Viele Grüße, Thorsten
AntwortenLöschen